Imagine having fresh, nutrient-packed greens right on your kitchen counter, ready to harvest in just 7-14 days. Growing microgreens at home is cheaper than buying them, takes little space, and requires no gardening experience. Whether you live in an apartment or a house, you can grow these tiny powerhouses year-round.
What Are Microgreens?
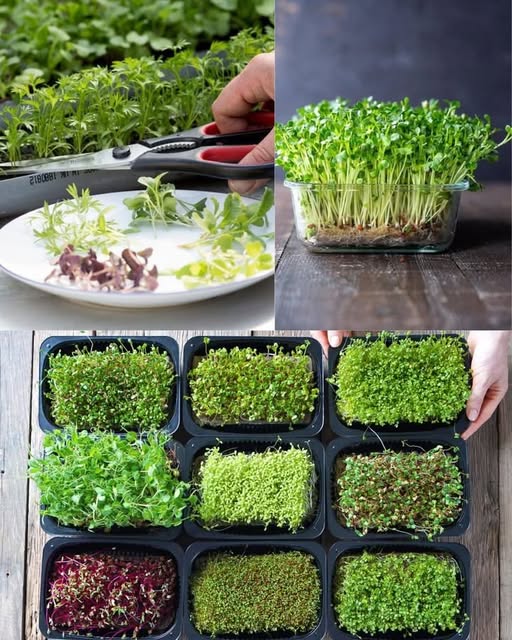
Microgreens are young vegetable or herb plants harvested just after their first leaves develop. They’re richer in vitamins and minerals than mature plants. Popular varieties include broccoli, radish, sunflower, and pea shoots. You only need seeds, soil, light, and a shallow container to start.
Why Grow Microgreens?
Microgreens offer 40x more nutrients than full-grown plants, boost meals with fresh flavors, and reduce grocery costs. They’re perfect for salads, sandwiches, or smoothies. Growing them yourself ensures no pesticides or plastic waste from store-bought packs.
What You’ll Need
| Item | Purpose |
|---|---|
| Seeds (e.g., broccoli, radish) | Base for growing microgreens |
| Shallow tray/container | Holds soil and seeds |
| Potting soil | Provides nutrients and support |
| Spray bottle | Gentle watering without disturbing seeds |
| Sunlight or grow light | Essential for growth |
Step-by-Step Guide
- Prepare the tray: Fill your container with 1-2 inches of moist soil.
- Sow seeds: Scatter seeds evenly across the soil—no need to space them.
- Cover lightly: Sprinkle a thin layer of soil over seeds and mist with water.
- Keep moist: Spray water 1-2 times daily. Avoid overwatering.
- Provide light: Place near a sunny window or under a grow light for 4-6 hours daily.
- Harvest: Cut greens with scissors when they’re 2-3 inches tall (7-14 days).
Remember
Always use clean containers to prevent mold. If seeds don’t sprout, they might be old—buy fresh ones. While microgreens are safe for most people, rinse them well before eating. If you have allergies, test a small amount first. Consult a doctor if you’re unsure about adding new foods to your diet.