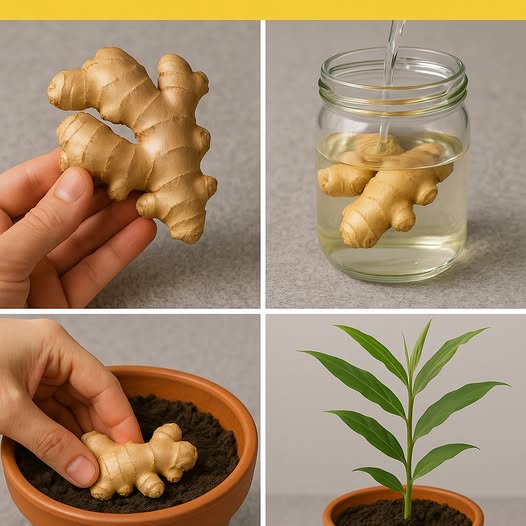
Imagine having fresh ginger at your fingertips all year round—no trips to the store, no plastic waste, and no worries about pesticides. Growing ginger indoors isn’t just easy; it’s a game-changer for anyone who loves cooking, natural remedies, or simply the joy of nurturing plants.
What You Need to Get Started
Ginger grows from pieces of the root (called rhizomes) you can buy at any grocery store. Choose plump, firm roots with “eyes” (small bumps) on the surface. You’ll also need a wide, shallow pot with drainage holes, organic potting soil, and a warm spot with indirect sunlight.
Why Grow Ginger Indoors?
Homegrown ginger is fresher, more flavorful, and free from chemicals. It’s cheaper than store-bought over time, and you can harvest only what you need. Plus, ginger has anti-inflammatory properties and aids digestion—having it fresh maximizes these benefits.
Materials and Their Roles
| Item | Purpose |
|---|---|
| Ginger rhizome | Starter plant |
| Potting mix | Nutrient-rich, well-draining soil |
| Shallow pot | Space for roots to spread |
| Spray bottle | Keep soil moist without overwatering |
Step-by-Step Guide
- Soak the rhizome: Place ginger in warm water overnight to wake up the growth nodes.
- Prepare the pot: Fill it ¾ full with soil. Lay the ginger flat, eyes facing up.
- Cover lightly: Add 1-2 inches of soil. Water gently until damp.
- Place in warmth: Keep near a window (no direct sun) at 70–80°F (21–27°C).
- Mist regularly: Keep soil moist but not soggy. Shoots appear in 2–8 weeks.
- Harvest: After 8–10 months, dig up a section and replant the rest.
Remember
Don’t overwater: Ginger rots in soggy soil. Use a spray bottle for light watering. If using ginger medicinally, talk to a doctor—it can interact with blood thinners. Store harvested ginger in the fridge wrapped in paper towels, or freeze it for long-term use.

